If you follow my other blog Earl Grey, you might have seen my screencast on how to create product collages. Today, along those lines, I’m going to share a few simple ways to remove product image backgrounds with Photoshop. These techniques are great if you love creating clean roundups for your blog. If you’re a shop owner, this tutorial can be really helpful in brightening up your product photos.
I always try to choose images that already have solid light colored backgrounds. This is tricky because some of the best products are photographed on non-white backgrounds. Sometimes I try to make them work in the collage just as they are by making them circular or creating a grid. For this tutorial, I’ll stick to working with simple backgrounds.
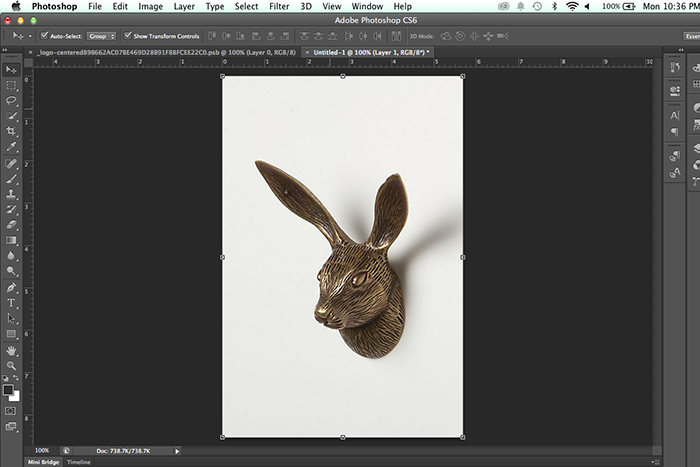
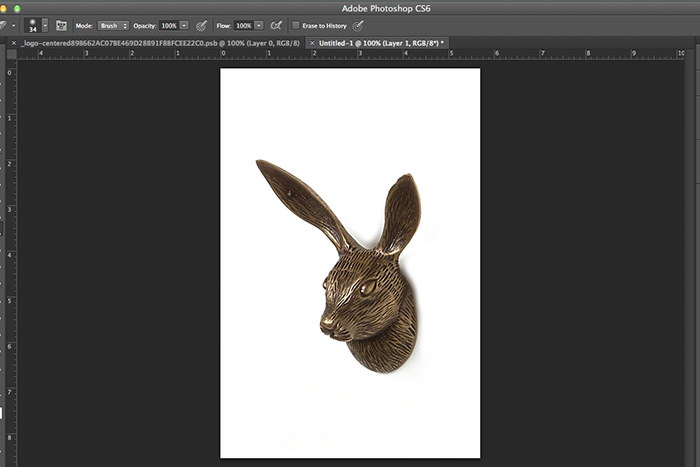
Okay, here we go! First open up a product photo in Photoshop. Any version of PS should work.
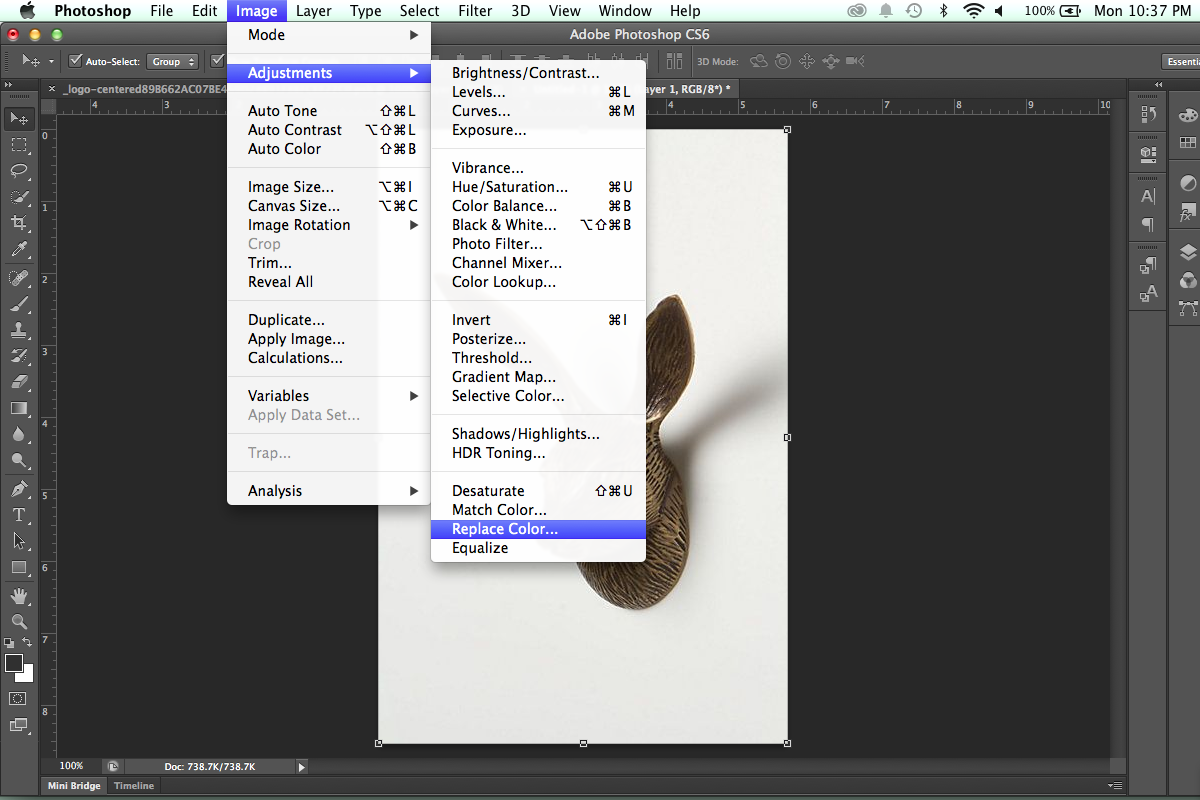
 Select Image > Adjustments > Replace Color
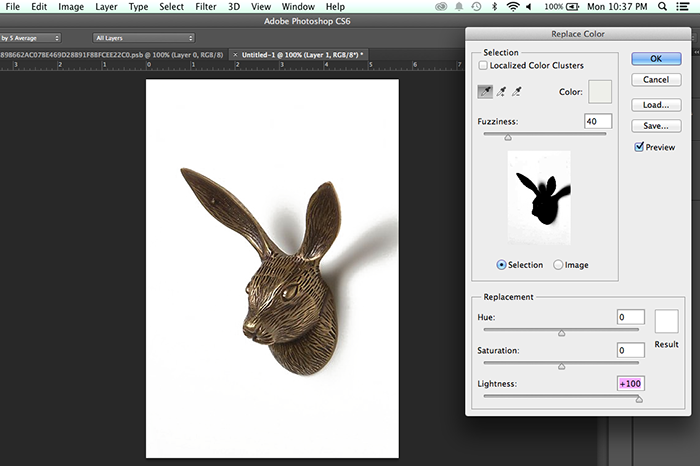
Use the eyedropper to select the background color you want to change. Then move the lightness bar all the way to 100%. Sometimes it also helps to adjust the Fuzziness setting.
Now, the background is white but there are still some shadows (bunny ears!) that might make this image look less smooth in a collage. To fix that, choose the Eraser Tool and set the Hardness level to 0%. Then you can subtly erase parts of the shadows.

Here is the final result:
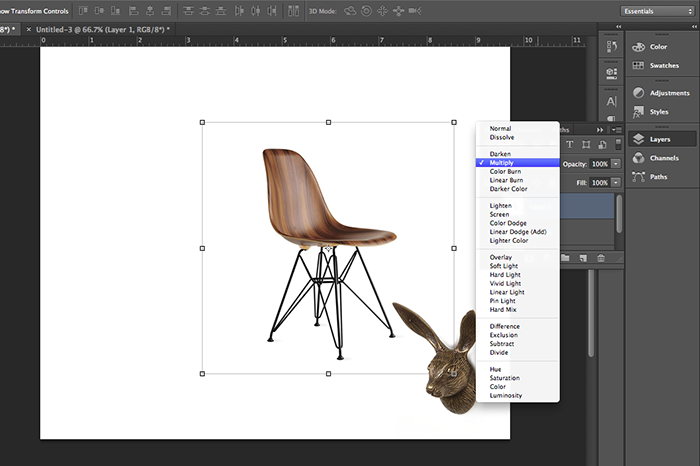
If you’re making a collage of products, you might already have white backgrounds but will need to keep them from overlapping other product images.
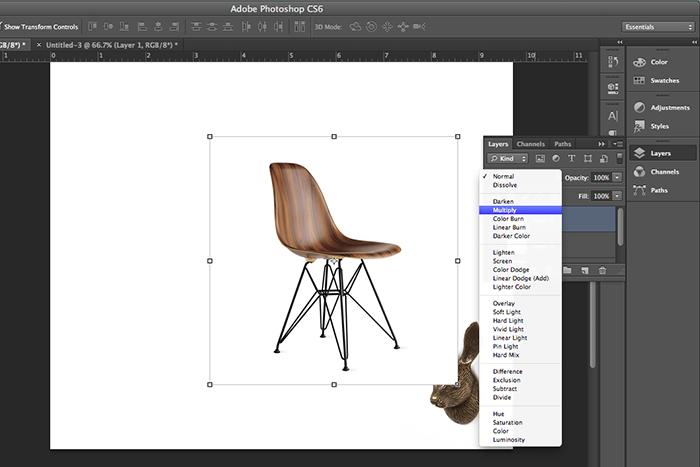
See how the background of the chair covers the image below it? Instead of cropping it or erasing the background, you can go to the Layers panel and change the layer blend mode to Multiply. This will make the white background transparent.
Alternatively, you could select the Magic Eraser and click the white background to make it disappear. That option works best when the product contrasts strongly with the background.
I used a combination of these techniques to create the main graphic for this post. Hope this tutorial was helpful for you! If you have any Photoshop tutorial requests, I would love to hear them.
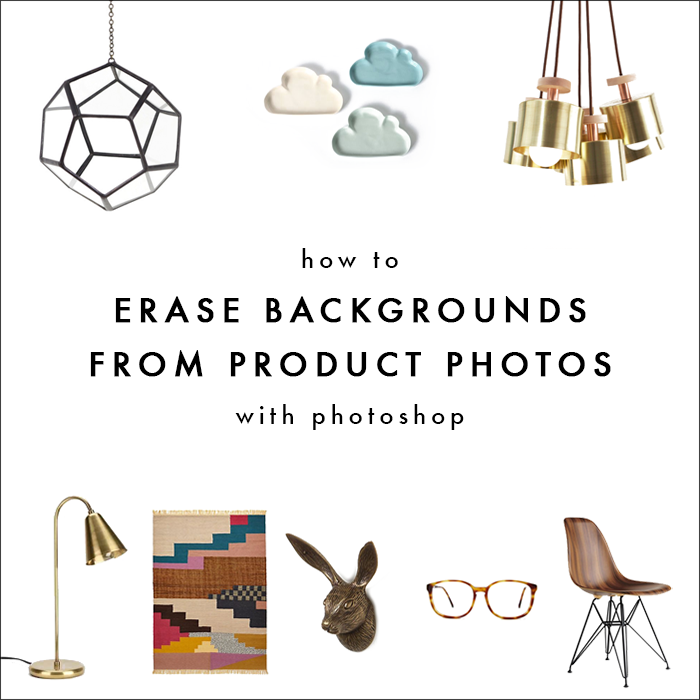
Images used: Dodecahedron Hanging Terrarium, Cloud Trinket Dish, Spun Cluster, Assembly Cone Table Lamp, Fringed Cusco Rug, Rabbit Forestry Hook, Eames Molded Wood Side Chair, Vintage Amber Wayfarer Glasses


Laura says
Thanks so much for this – I loved your collage piece and this will be very handy too! I’d love to see some more tutorials on Photoshop from you. I’d like to be able to put together a collage that’s a bit more structured using shapes rather than just floating on a white background (so that the pictures are in the shapes if that makes sense?!) or maybe you could do a photoshop cheat sheet of things us beginners might not know about? Other than that I just enjoy coming here to get a bit of inspiration!
http://www.lovedbylaura.com
Mary L. says
Thank you! I have been trying to find a way to take the background of many of my pictures, and this is perfect. Have a wonderful year!
http://sweetheartsofthesouth.blogspot.com
Abby says
Does the background have to be white? I occasionally take photos of my pieces with other items around them but I’d love for them to be like these for my website… Just wondering if the concept is the same but with a “scattered” for lack of better word background. Thanks!
Anila Jain says
I would say, its not actually a great idea that every time photos will be taken in white background. Whatever the background is, if you want to place the image in white background then simple cut out using photoshop pen tool can help. If you are not expert enough or you have to post process huge number of images then you can take help or outsource them as well.
Annica says
Definitely easier than what I’ve been doing! thanks for the tips!
Annica
http://www.lifemodifier.com
Aysegul says
Thank you for this. Exactly what I needed! :)
Jennifer says
Awesome! So glad it helped! :)
Ellen says
Ahh thank you so much! I’ve been wondering how to do this for ages! Your step by step was really easy to follow.
Jennifer says
So happy this helped, Ellen! :)
vanessa says
thank you for the tutorial! I have never knew how to do this before or could even think! of it..another skill in photoshop down :)
Jennifer says
You’re welcome, Vanessa!! :)
Brianne says
Thank you thank you thank you! Will this work with Elements as well?
Jennifer says
You’re so welcome, Brianne! Yes it should work with Elements. :)